Build a Travel Diary App With MERN Stack Tutorial EP1 : Setting up the server using Express.js and Mongo DB
We are setting up a server and connect it to a MongoDB database

We are going to build a travel diary app using MERN stack which stands for Mongo DB, Express JS, Node JS and Mongo DB. For today, we would be mostly just focusing on using Express JS to run the server and connecting to the MongoDB database. The server is the most important part of the web application as it is necessary to run the backend APIs, so lets get into it.
Setting up server.js
Step 1 : Let's create a new file with the name server.js. This would be easy to distinguish the file with any future files.
Step 2 : Now , we need to import the required node modules to run the application backend. So, we going to import dotenv, express , mongoose and path. So , let's see what those modules are for. Well , dotenv is going to connect our .env file that going to hold our Mongo DB URI that helps us to connect the server to the mongoDB database. Next, we have express which is the commonly used server framework for Node JS which will help us to handle requests and manage our routes. Meanwhile, mongoose is the node module that helps us to connect the mongoDB database to our project. Finally, path which is used to handle file path when we build our project to ease with deploying the build.
require('dotenv').config();
const express = require('express');
const mongoose = require('mongoose');
const path = require('path');
Step 3 : Alright so since the node modules are set , but of course we will have to install them using our terminal later. But for now, let's just focus on finishing up our server.js file. So, we will continue with initializing Express JS. We will just set up a variable called app that would also call the express function.
//init app
const app = express();
Step 4 : Next, let's connect to the mongodb by setting the required options like the credentials such as username and password to connect to the mongoDB database. Then we will also setup our mongoose to connect to the mongoDB URI. We will call the mongoDB URI as process.env.DATABASE and we will add the URI details in the .env file for security purposes when we push the code to the Github repository.
//connect to mongodb
var options = {
    user: process.env.DBUSER,
    pass: process.env.PASS,
    useNewUrlParser: true,
    useUnifiedTopology: true,
  autoIndex: false, // Don't build indexes
  // reconnectTries: Number.MAX_VALUE, // Never stop trying to reconnect
  // reconnectInterval: 500, // Reconnect every 500ms
  connectTimeoutMS: 30000, // Give up initial connection after 10 seconds
  socketTimeoutMS: 200000, // Close sockets after 45 seconds of inactivity
  family: 4 // Use IPv4, skip trying IPv6
};

mongoose.connect(process.env.DATABASE, options, function(err) {
    if (err) throw err;
    console.log ('Successfully connected to MongoDB');
    console.log(mongoose.connection.host);
    console.log(mongoose.connection.port);
});
Step 5 : Alright, since this is going to be a travel diary app, we might allow the user to upload images in the application, therefore it's best to set some conditions now to limit the size of the image files that we will allow the user to upload. As for now, we will limit it to 12MB.
//body parser
app.use(express.json({limit : "12mb"}));
app.use(express.urlencoded({extended: false , limit : "12mb"}));
Step 6 : So, we will actually need routes to handle the requests that we will receive from the frontend so let's create some fake routes for testing purposes for now.
//routes
app.use('/api/test' , require('./routes/testApi'));
Step 7 : We will now use our path module to help managing our directories in order to handle our deployment in the future for hosting purpose, by using this path we can connect our client and server and run them both in a single port.
app.use('/' , express.static(path.join(__dirname , "client" , "build")));
app.get('*' , (req , res) => {
  res.sendFile(path.resolve(__dirname , "client" , "build" , "index.html"));
});
Step 8 : For the final step of setting up server.js file, let set a way for our app to be able to listen to our port. For testing purpose , we will set the port default to 5000 but when we deploy we might have to consider setting the port number in our env file for security purposes so we will also use process.env.PORT to set our port variable.
//listen to port
const PORT = process.env.PORT || 5000;
app.listen(PORT, () => console.log(`Server is running on port: ${PORT}`));
Setting up a mongoDB database
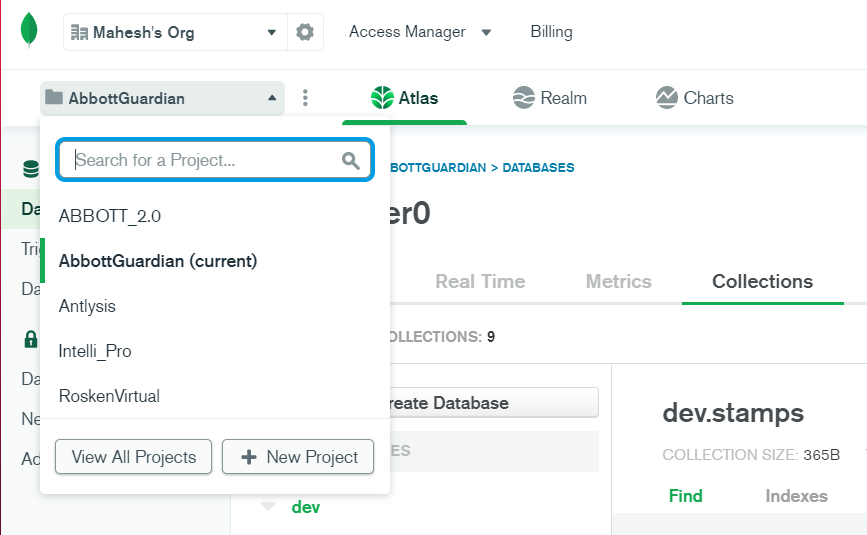
Step 9 : We are actually done for server,js file but we will be needing our mongoDB URI to connect our database to the web application. So let's go to mongodb website and either sign in if you have an account or create an account if this is your first time using it. Once you are in the console, look for the dropdown button of the projects and click new project in it.
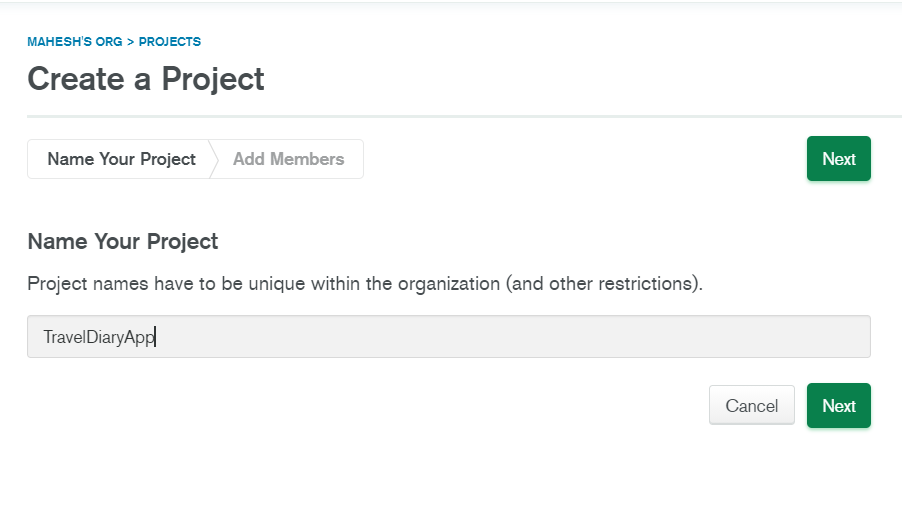
Step 10 : Give the project a name and click Next. The next page would give you choice to add members if you interested in doing so, or you could just straight up click on Create Project.
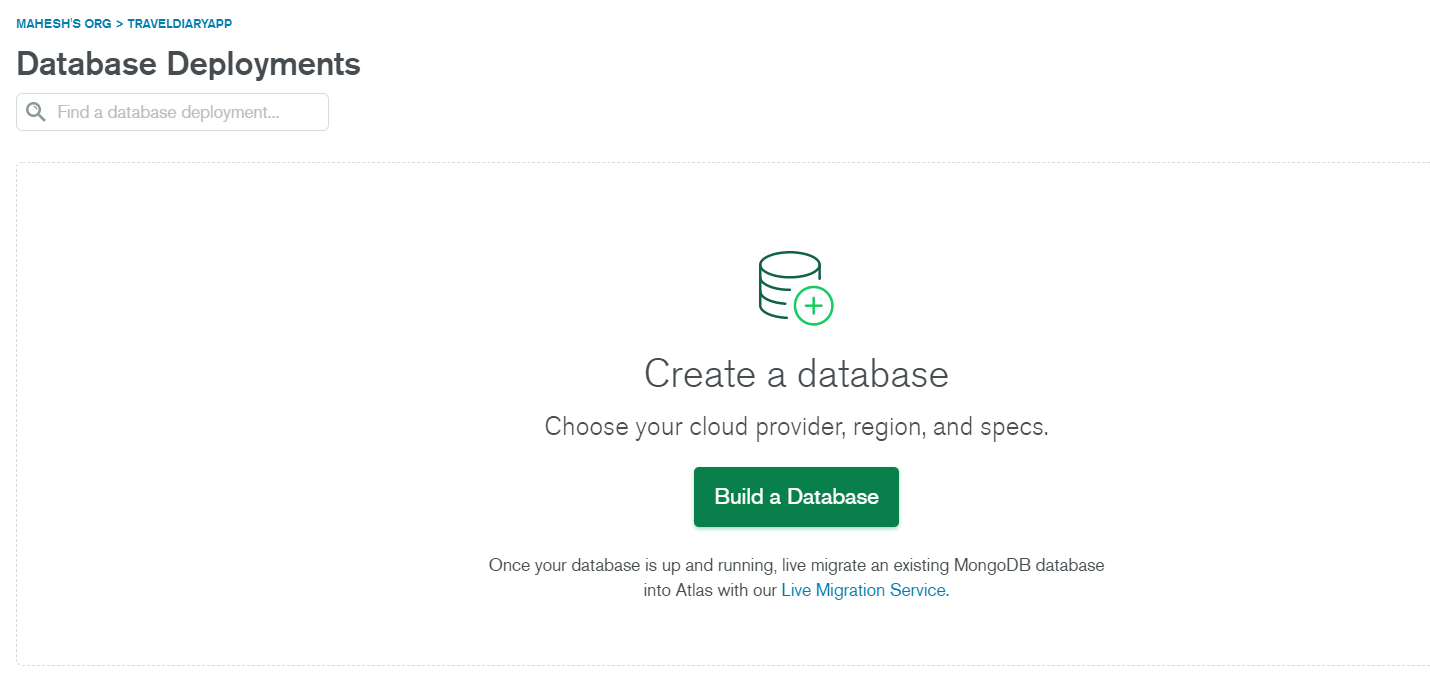
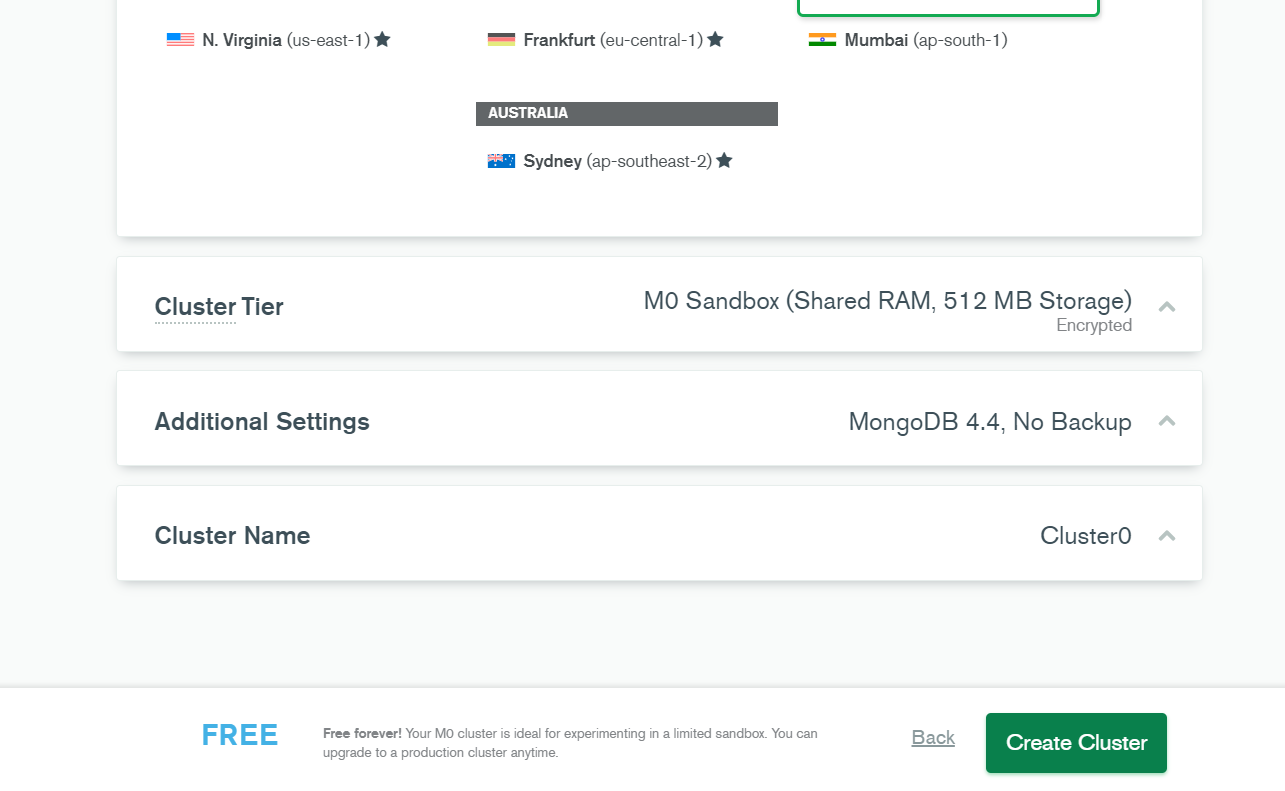
Step 11 : Now, let's create our database by clicking on Build a Database. I am picking the free shared option and will be going with aws as my cloud provider and region to ap-southeast1 but you can feel free to make your own choices according to your budget and region.
Step 12 : Then, I am just going to click Create Cluster and finish the process of creating the database.
Step 13 : It's going to take some time while it takes to create the cluster so while that happens let's set up some security permissions and credentials. You can find them in the sidebar of the console.
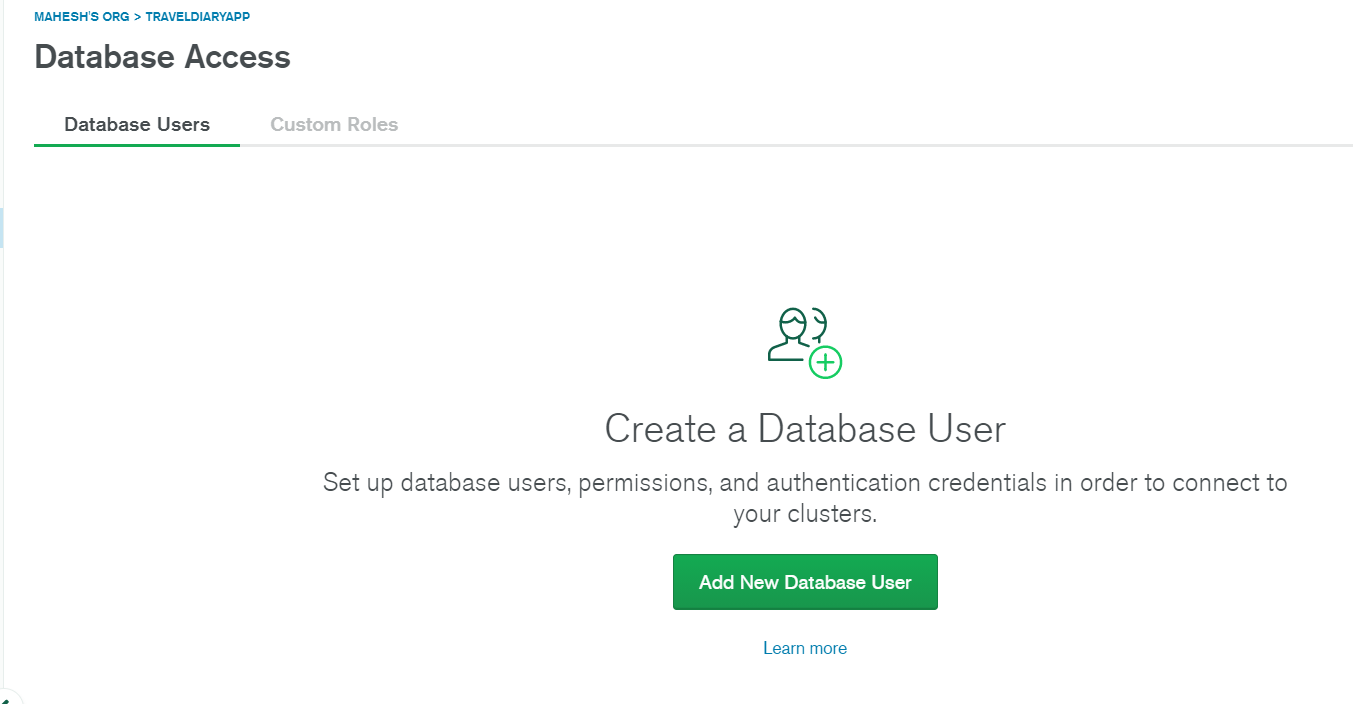
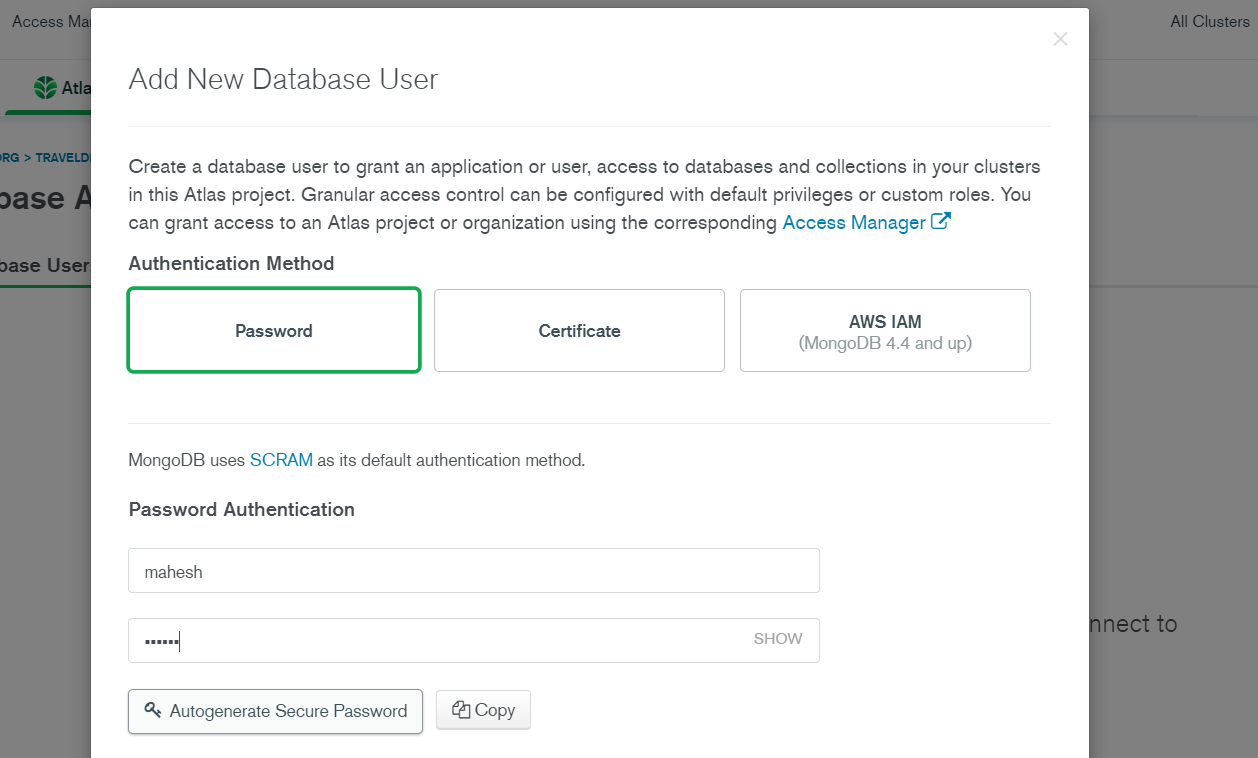
Step 14 : Let's start with Database Access. Click on the button and you will be redirected to a page that gives you a button to Add New Database User. Then , pick the password authentication method and set your username and password. Then, just click Add User and you will see the user added to the table which displays all the user who have access to your database.
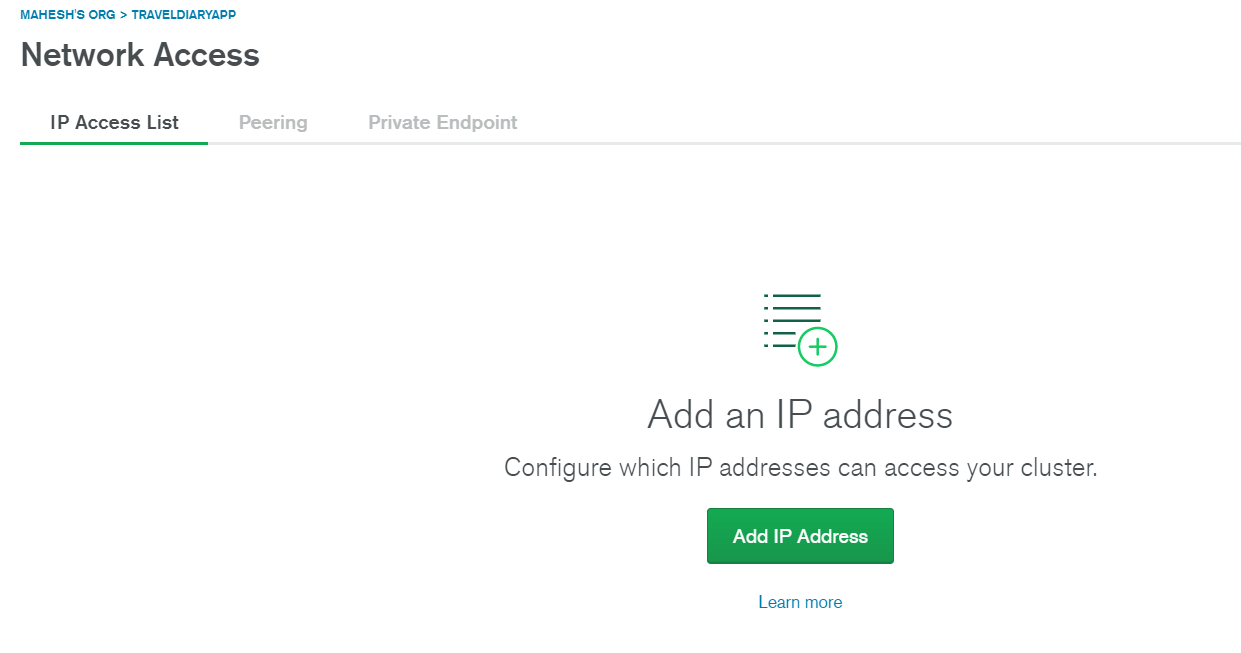
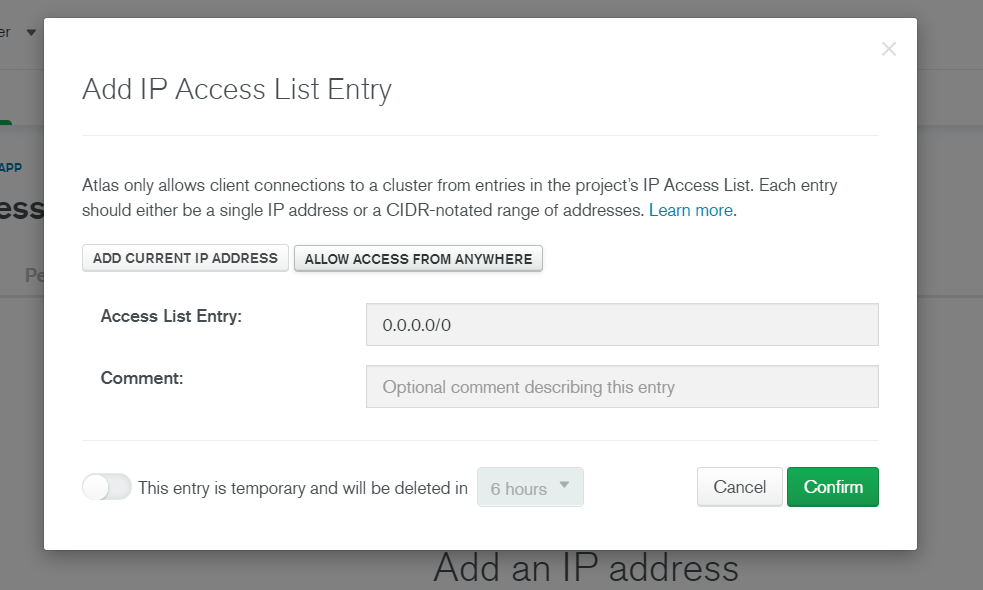
Step 15 : Now, let's set up the Network Access. As usual, just click on the Network Access and you will be redirected to a page where you can see a button called Add IP Address. Click on it and we will see a form modal. Click on Allow Access From Anywhere if you are lazy to configure the IP Address like me, that will allow you to use any IP address to access your database which is fine for our testing purpose for now. Or you can choose Add Current IP Address, that will only add your current IP address but if your IP Address change then you will have to come and edit or add a new IP address which is a safer option but for now I would just suggest to go with Allow Access From Anywhere to ease our work and click Confirm, it might take some time to set it up but once it's done we are good to go.
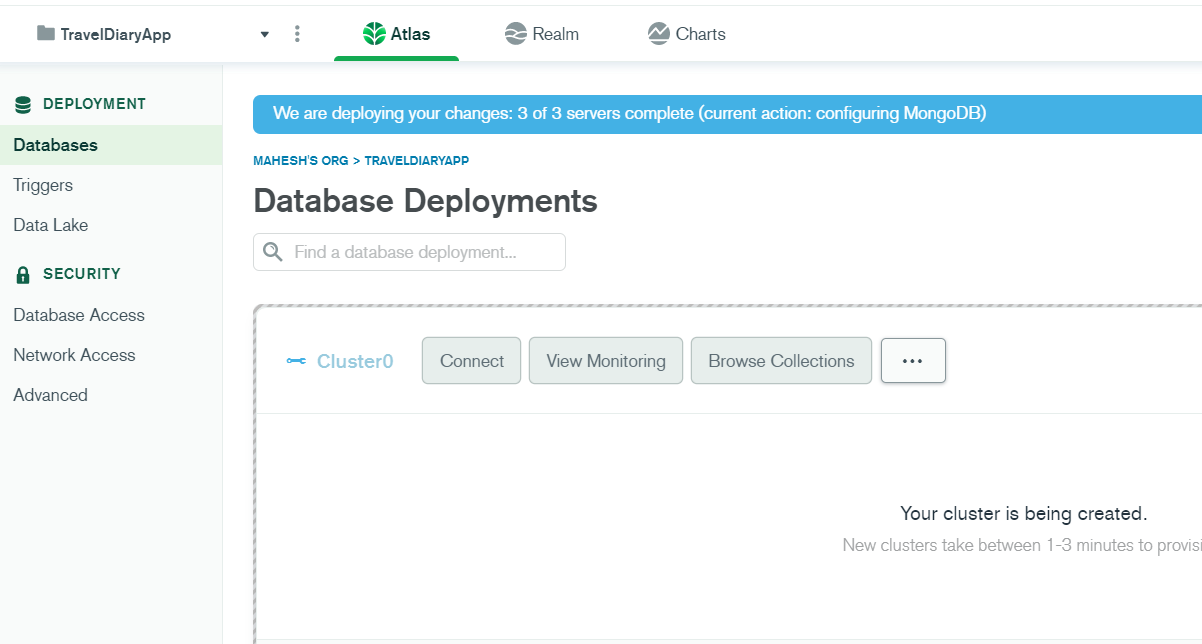
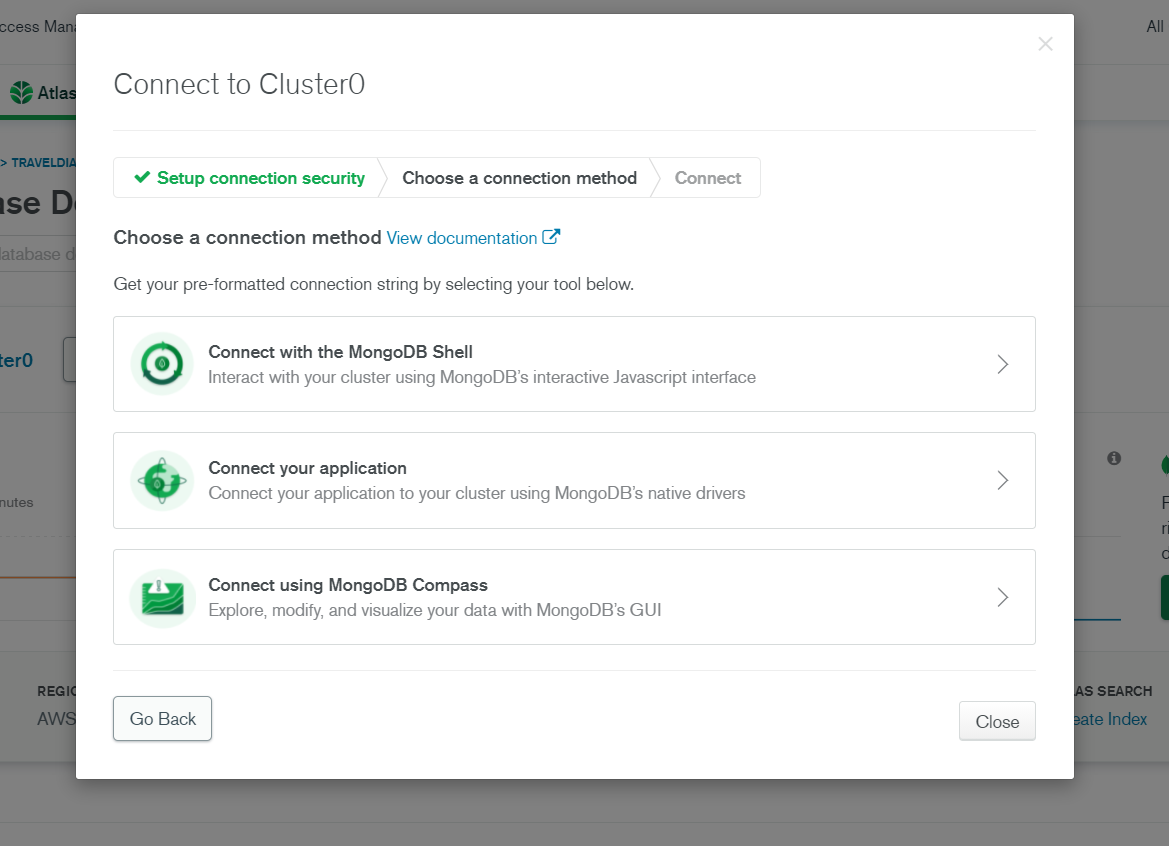
Step 16 : Alright, let's hope by now the cluster have been created . Click on Databases on the sidebar and that will bring you to your cluster home page. Click on Connect and you will see Connect to Cluster0 popout.

Pick connect to your application and you will now have your MongoDB URI.
Make sure your driver is set to Node JS and then copy your connection string which we will add in our .env file.
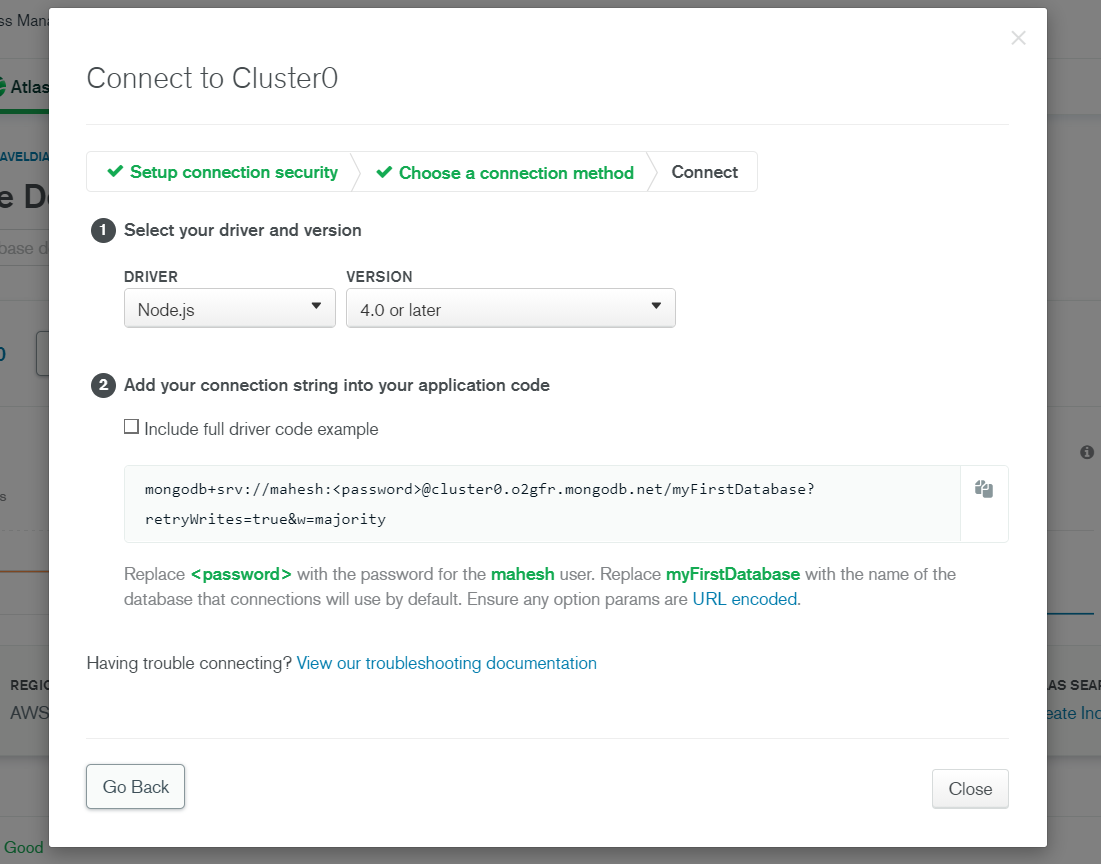
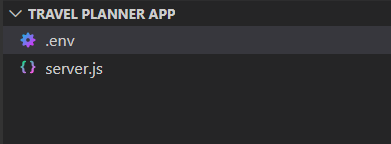
Step 17 : So , now let's create a .env file in the same folder with our server.js.
Step 18 : In our .env file, we will add our required variables to complete our connecting the MongoDB database to our server. By the way, you will see myFirstDatabase in your MongoDB connection string, it's up to you if you want to keep it that way or you could change it to your preferred choice but make sure to just use alphabets and numbers.
DATABASE = "YOUR MONGODB CONNECTION STRING"
DBUSER = "YOUR USERNAME WE SET IN DATABASE ACCESS"
PASS = "YOUR PASSWORD WE SET IN DATABASE ACCESS"

Installing node modules
Step 19 : Now , open up your terminal and let's install the node modules we imported in the server.js file previously.
npm i dotenv mongoose express path nodemon
Step 20 : Now, you can see there is some new files and directory in your folder. We can ignore most of it except for package.json. We are going to setup the server to run on the package.json file. If you open the file now you will see some dependencies of all your installed modules. Let's add some code on top of it. If you have nodemon installed in your app , at the start portion you can write "nodemon server.js", if not use "node server.js" instead.
{
  "name": "server",
  "version": "1.0.0",
  "description": "The backend of the application",
  "main": "server.js",
  "scripts": {
    "start": "nodemon server.js"
  },
  "dependencies": {
    "dotenv": "^10.0.0",
    "express": "^4.17.1",
    "mongoose": "^6.0.6",
    "path": "^0.12.7"
  }
}
Run testing
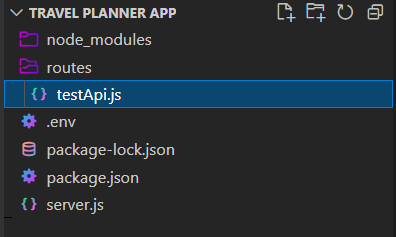
Step 21 : Now , lets create a new folder called routes where we will add a new file called testAPI.js to test our server.
Step 22 : In order to test our API, let's add a simple code in the testAPI.js file. We will talk more about our route files in the next article.
require("dotenv").config();
const express = require('express');

const router = express.Router();

router.post('/test' , (req , res) => {
  const { number } = req.body;
  console.log("Check Number : " , number);
  return res.status(200).json({status: "Success", number});
});

module.exports = router;
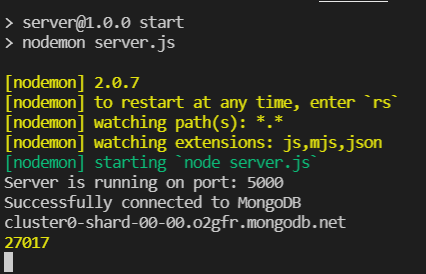
Step 23 : Now, save all your file changes and we can finally run our server in the terminal. We will use npm start to run our server.
npm start
You should get an output which indicates the server is running successfully. This should be great enough to prove the server is running successfully.
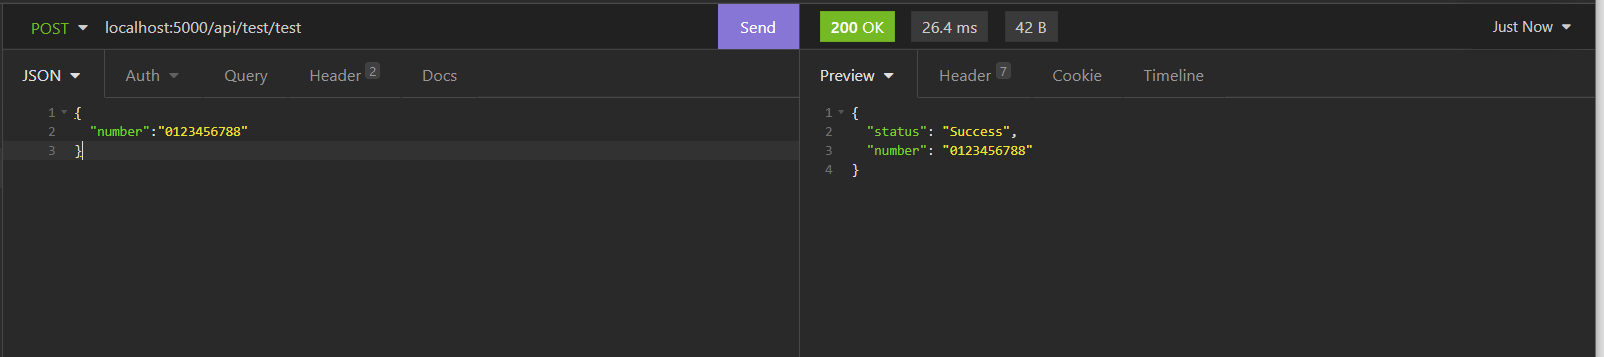
Step 24 : As a bonus step , we can test the API that we included to just be sure the routes is working fine. Open up any API testing software such as Postman or Insomnia. I am going with Insomnia here. I am going to set the request as POST and add localhost:5000/api/test/test in the url . As this is a POST api , we need to send the number in the query so let's add a query in the query space.
{
    "number":"0123456788"
}
The final result should look like this which eventually brings us to the end of our tutorial. You can see the response status shows 200 OK which means it was successful and you have the status as Success and the number being displayed in the output.
It's really awesome if you have made up this far. But obviously we are just getting started, and we have a long way to go from here. I would love any feedback and how I could constantly improve my articles for the future. So, please leave your thoughts under the comments or contact me through raomahesh610@gmail.com. I am planning to post a new article weekly so you can hope for the next episode to be up by next week Sunday. Till then, goodbye and have a great weekend.