

Build a Travel Diary App With MERN Stack Tutorial EP3 : Setting up the backend for managing diaries and exploring S3 image upload

Hi, welcome back. I am actually glad you are still following up the tutorial, backend can be quite tedious and boring. Don't worry we will be done with the backend in the next two to three episodes. Next, let's take a look at the backend for setting up diary posts. We gonna try to build a CRUD based backend to ease up things for us and at the same time help you to understand all the basics that you require to know when building a backend API. I am trying to help you understand how to work with arrays and images.
First, lets understand CRUD. CRUD stands for create, read, update and delete. In our case, we are going to create diaries, update diaries, read diaries and also delete them. Let's get started
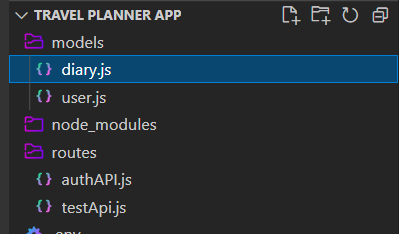
Step 1 : As for how we did for user, we also need to set up a model for the diaries. We will name it diary.js and we will add it inside models folder.
And let's add this code inside it.
const mongoose = require('mongoose');

const diarySchema = new mongoose.Schema({
    title: {type: String, required: true},
    description: {type: String, required: true},
    imageKey: { type: [String], default: undefined},
    favspot: {type: [String], default: undefined},
    favrestaurant: {type: [String], default: undefined},
    favmeal:{type: [String], default: undefined},
    startdate: {type: Date, required: true},
    enddate: {type: Date, required: true},
    status: {type: String, default:"Approved"},
    reason: {type: String},
    customer: {
        number: {type: String, required: true},
        name: {type: String, required: true}
     },
     timestamps : true
});

const Diary = mongoose.model('Diary',diarySchema);

module.exports = Diary;
We are going to allow the user add title, description, the travel date, favorite travel spot, restaurant and meal and also upload images of their travel. So , now some information going to be compulsory such as title, description, images, start date and end date of the travel. And we also going to allow them add multiple images and favorite spots, restaurants and meals. Therefore, to allow that their String is wrapped in the famously known as array symbol, []. The status of the diary will be set to default as Approved but we will have an Admin API where the admin can change the status of the posts if they find it inappropriate and also the admin can give a reason to why the post being rejected or removed. With the model sorted out , we can know head in into writing the code for the diaryApi.js.
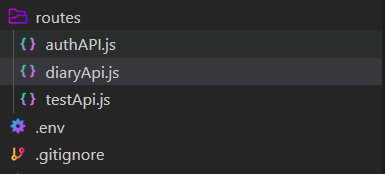
Step 3 : So, we are going to create a new file called diaryApi.js in the routes folder.
Step 4 : Let's now import the file in our server.js by adding it in the routes section.
//routes
app.use('/api/test' , require('./routes/testApi'));
app.use('/api/auth',require('./routes/authAPI'));
app.use('/api/diary',require('./routes/diaryAPI'));
Step 5 : In our diaryApi.js , we can now set up the code to create a diary. So, add this code in the file.
require("dotenv").config();
const express = require("express");
const async = require("async");
const User = require("../models/user");
const Diary = require("../models/diary");
const { makeid } = require("../function/misc");
const AWS = require("aws-sdk");

const region = "ap-southeast-1";
const accessKeyId = process.env.ACCESS_KEYID;
const secretAccessKey = process.env.SECRET_ACCESSKEY;
const bucketName = process.env.BUCKETNAME;

AWS.config.update({
    accessKeyId,
    secretAccessKey,
    region
});

const router = express.Router();

//Upload the diary by creating a new entry in the database

router.post("/upload", (req, res) => {
    const { number,title,desc, favspot, favmeal, favrestaurant, uri, startDate, endDate } = req.body;
    var tempData = {};
    const regex = /^data:image\/\w+;base64,/;
    let diaryImgKey = [];
    console.log(req.body);
    User.findOne({ number }, (err, usr) => {
      if (err || !usr) {
        console.log(err);
        console.log("user not found");
        return res.status(400).json({ error: "User not found" });
      }

      async.forEach(
        uri,
        (photoObj, callback) => {
          console.log(photoObj.uri);
          const body = Buffer.from(photoObj.uri.replace(regex, ""), "base64");
          const tempId = makeid(6);
          const key = `${number}/${tempId}/posmImage${tempId}`;
          diaryImgKey.push(key);
          const s3 = new AWS.S3();
          const param = {
            Bucket: bucketName,
            Key: key,
            Body: body,
            ContentEncoding: "base64",
            ContentType: photoObj.fileType,
          };

          s3.putObject(param, (err, data) => {
            if (err) {
              console.log("Error when uploading images to s3 in update posm : ");
              console.log(err);
              return res.status(400).json({ error: "Internal Error" });
            }

            console.log({ data });
            console.log("Uploaded to S3");
          });

          callback();
        },
        (err) => {
          if (err) {
            console.log("Error after loop photoset in update posm : ");
            console.log(err);
            return res.status(400).json({ error: "Internal Error" });
          }

          let newUpload = {
            customer: {
              name: usr.name,
              number: usr.number
            },
            status: "Approved",
            title: title,
            description: desc,
            imageKey: diaryImgKey,
            favspot: favspot,
            favrestaurant: favrestaurant,
            favmeal:favmeal,
            startdate: startDate,
            enddate: endDate,
            recorddate
          };

          Diary.create(newUpload, function (err, mydiary) {
            if (err) {
              console.log(err);
              return res.status(400).json({ error: "Cannot create New Upload." });
            }
            return res.status(200).json({ status: "Success"});
          });
        }
      );
    });
  });

module.exports = router;
This portion of code is for uploading a diary, we are getting all the required information and the first thing we do is checking if the user exist using the phone number. Then we process the multiple image uri we get from the frontend and upload them to S3 . I will guide you after this to setup the S3 and also build the required modules to convert the uri which will be in base64 format to image key in string format so we can save it in the database. Then, we put all this information we get in a object named newUpload and send it to the be saved in the database.
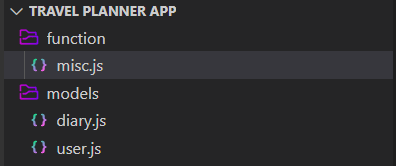
Step 6: Let's start with converting the base64 uri of the image into string format. We will create a new folder called function and create a new file in it named misc.js. In the file, add this code below.
const makeid  = (length) => {
    var result           = '';
   var characters       = 'ABCDEFGHIJKLMNOPQRSTUVWXYZ0123456789';
   var charactersLength = characters.length;
   for ( var i = 0; i < length; i++ ) {
      result += characters.charAt(Math.floor(Math.random() * charactersLength));
   }
   return result;
}

module.exports = {
    makeid
}
Step 7: Next, let's setup an AWS S3 to store our images. As the first step , let's install aws-sdk into our application. We can do that using the code below.
npm i aws-sdk async
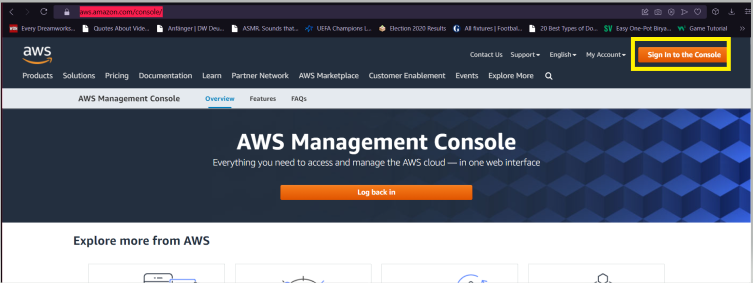
When that done, let's go to this AWS S3 console . Then, click on the sign in to the console button on the top of the navbar page.
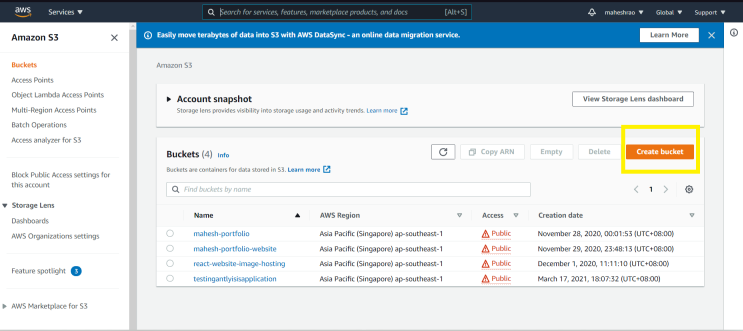
Then, if you are a new user , create a new account or if you already have an account and create a new one. Then , you will be redirected to the home page , you will see a search bar on the home page. Search for Buckets in it and you will see Buckets S3 Feature as your first result . Click on it.

Once you enter the Amazon S3 Buckets page . Click on the Create Bucket button.
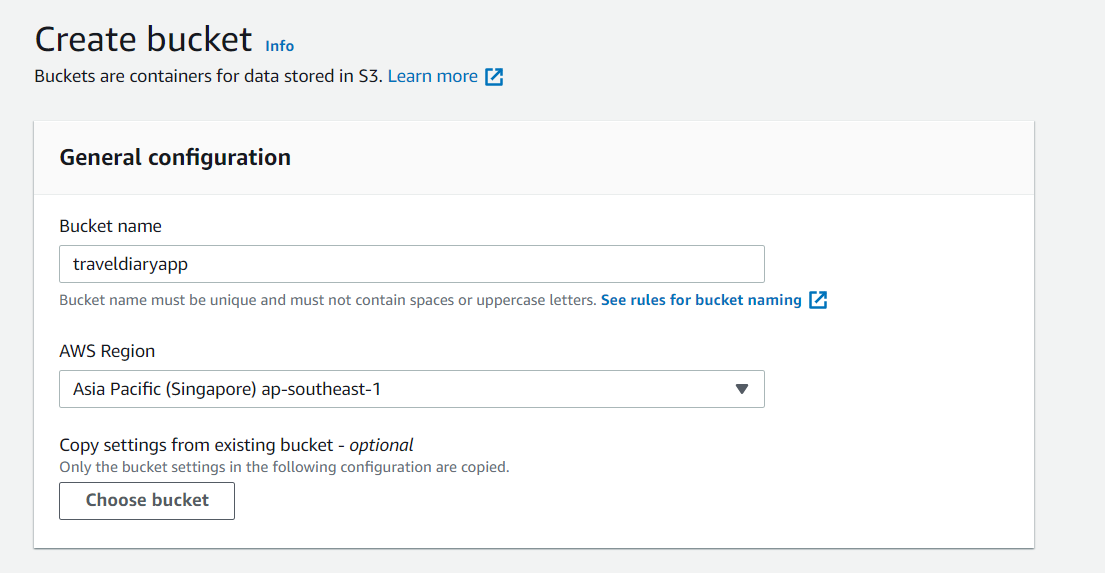
In the Create Bucket page, the first thing is give your bucket a name that you like. In this case , I will be calling it traveldiaryapp. Remember bucket name cannot be uppercase, keep them all lowercase.
Next, let's disable the Block all public access and accept the checkbox which displays I acknowledge that the current settings might result in this bucket and the objects within becoming public.
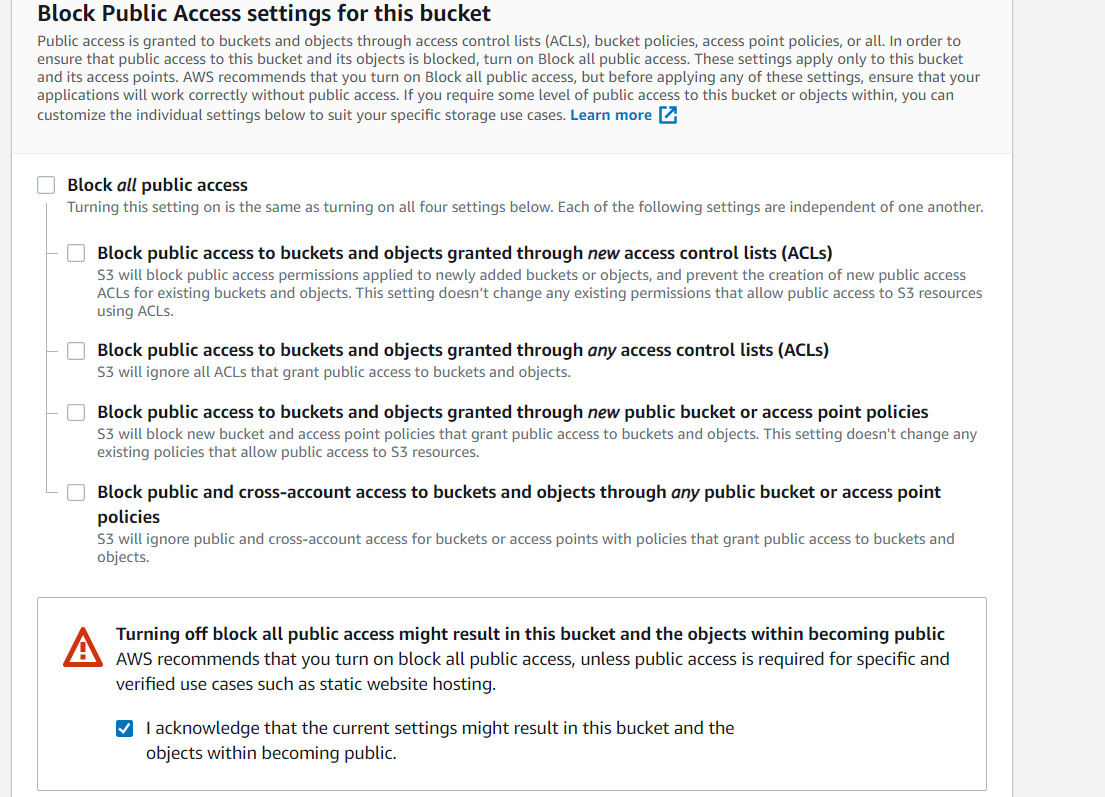
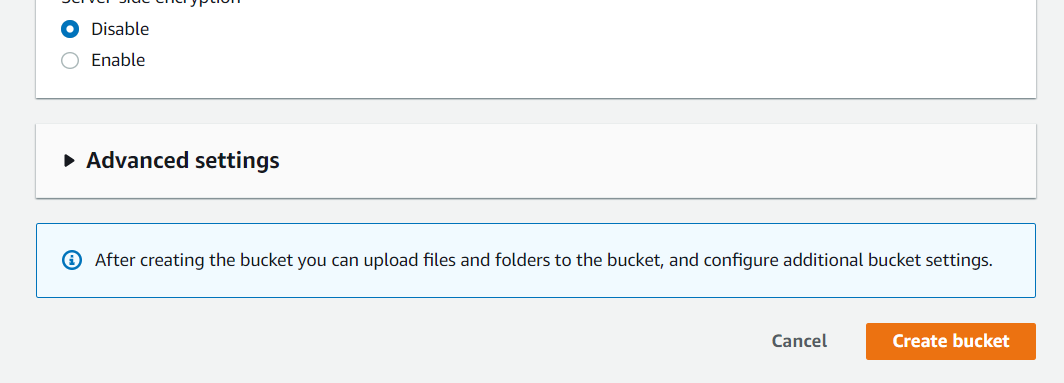
Now, the images will be available for public access and we can know display those images to all our users in the application in the future. Next, scroll to the bottom and click on Create Bucket.
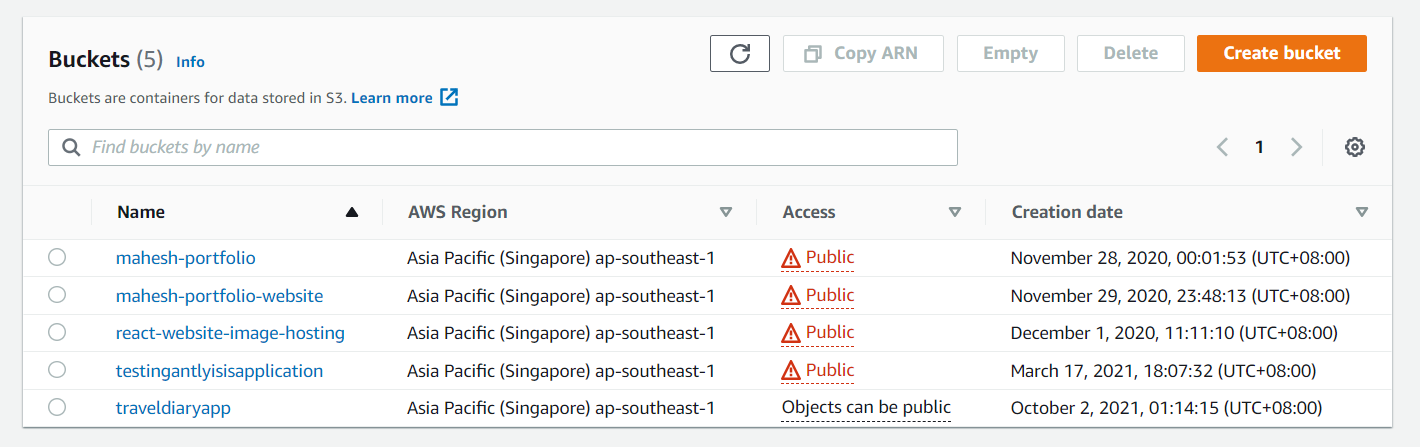
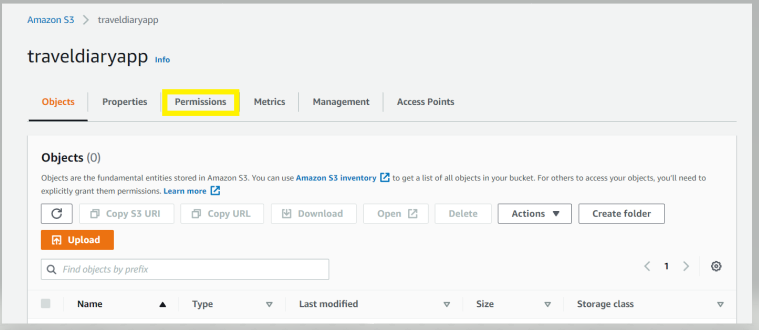
Now you will be able to see the bucket in your bucket list, go ahead and click on it.
Now in that page, click on the Permissions.
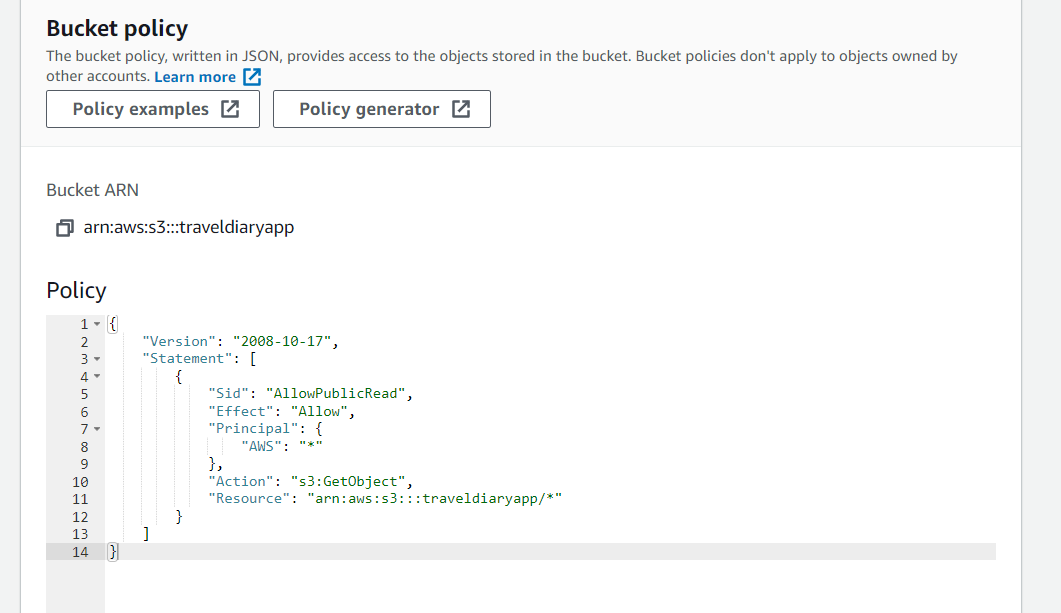
Scroll down to Bucket Policy and paste the code below. This is to ensure our S3 can be accessed without any restriction.
{
    "Version": "2008-10-17",
    "Statement": [
        {
            "Sid": "AllowPublicRead",
            "Effect": "Allow",
            "Principal": {
                "AWS": "*"
            },
            "Action": "s3:GetObject",
            "Resource": "arn:aws:s3:::yourbucketname/*"
        }
    ]
}
In the code below, you can see at resource , replace the yourbucketname with the actual bucket name you have given your bucket. It should look something like this.
Now, scroll down and click on Save Changes. And now if you go to your buckets page which you can access by clicking on the Buckets button on the sidebar, you will see the Access for your bucket changed from Object may be public to a red alert with public, which is a simple warning that S3 tells you to inform you know your S3 content is publicly accessible. Don't worry, as long you don't leak your Amazon console username and password, your information is safe and we do need all that information to be publicly accessible to allow any of our users to upload images into the application.
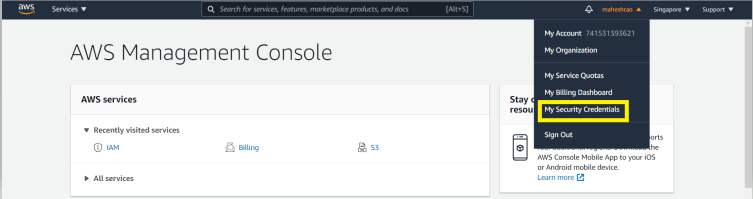
Now we need to obtain the Access Key from S3. Go back to your Console . On the top header , click on My Security Credentials.
 Then , in your security credentials page, under Access Keys , create a new Access Key.
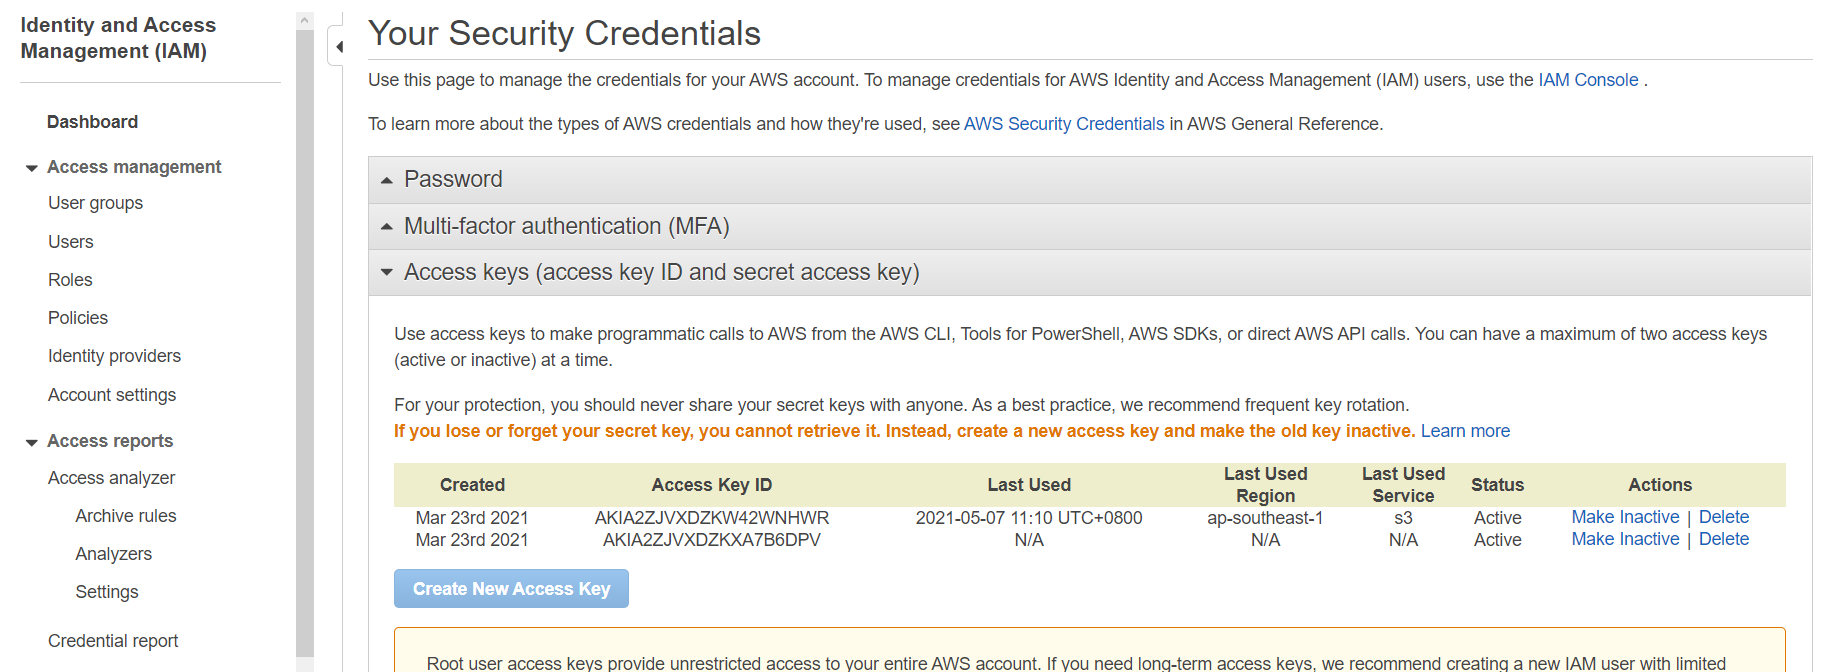 Your keys will look something like this:
Access key ID example: AKIAIOSFODNN7EXAMPLE
Secret access key example: wJalrXUtnFEMI/K7MDENG/bPxRfiCYEXAMPLEKEY
Click Download Credentials, and store the keys in a secure location. If you have any problem, please refer here for more clear instructions.
As our final step, go to your .env file and add the new line of code into our existing code. And replace the bucket name accordingly to your S3 bucket name, and also please replace your accesskey and secret access ID accordingly. Please don't wrap your accesskey and secret access ID inside a " " (do not use quotation marks).
BUCKETNAME="yourbucketname"
SECRET_ACCESSKEY=yoursecretaccesskey
ACCESS_KEYID=yoursecretaccesskeyid
Alright , that was really tedious but the rest will not be too hard to handle. So, now let's jump in into reading those diaries. As usual , paste the code below in your diaryApi.js after the /upload.
  router.post('/readAllByUser' , (req , res) => {
    const {number} = req.body
    console.log(req.body)
    var tempData = []
    const s3 = new AWS.S3();
    Diary.find({number:number}, (err, diaries) => {
      if(err) {
        console.error(err);
            return res.status(400).json({error : "Internal Error."});
      }
      if(diaries){
        async.forEach(diaries, (diary, cbTran) => {
          let temp = {
            status: diary.status,
            title: diary.title,
            description: diary.description,
            favspot: diary.favspot,
            favrestaurant: diary.favrestaurant,
            favmeal:diary.favmeal,
            startdate: diary.startDate,
            enddate: diary.endDate
          }
          if (diary.status == "Rejected") {
            diary.reason = diary.reason
          }
          diary.images = [];

          async.forEach(diary.imageKey , (key , next) => {
            const s3Param = {
              Bucket : bucketName,
              Key : key,
              Expires : 7200
            };
            // console.log(s3Param)

            s3.getSignedUrl("getObject" , s3Param , (err , url) => {
              if (err) {
                console.log("Error when get signed url in validations list : ");
                console.log(err);
                return res.status(400).json({error : "Internal Error"});
              }
              // console.log("push url to temp img")
              temp.images.push(url);
              // console.log(url)
              next();
            });
          }, (err) => {
            tempData.push(temp)
            cbTran()
          })

        }, (err) => {
          res.status(200).json({status: "Success", data: tempData});
        })
      }
    })
  })

  router.post('/readAllByUserStatusFilter' , (req , res) => {
    const {number,status} = req.body
    console.log(req.body)
    var tempData = []
    const s3 = new AWS.S3();
    Diary.find({number:number,status:status}, (err, diaries) => {
      if(err) {
        console.error(err);
            return res.status(400).json({error : "Internal Error."});
      }
      if(diaries){
        async.forEach(diaries, (diary, cbTran) => {
          let temp = {
            status: diary.status,
            title: diary.title,
            description: diary.description,
            favspot: diary.favspot,
            favrestaurant: diary.favrestaurant,
            favmeal:diary.favmeal,
            startdate: diary.startDate,
            enddate: diary.endDate
          }
          if (diary.status == "Rejected") {
            diary.reason = diary.reason
          }
          diary.images = [];

          async.forEach(diary.imageKey , (key , next) => {
            const s3Param = {
              Bucket : bucketName,
              Key : key,
              Expires : 7200
            };
            // console.log(s3Param)

            s3.getSignedUrl("getObject" , s3Param , (err , url) => {
              if (err) {
                console.log("Error when get signed url in validations list : ");
                console.log(err);
                return res.status(400).json({error : "Internal Error"});
              }
              // console.log("push url to temp img")
              temp.images.push(url);
              // console.log(url)
              next();
            });
          }, (err) => {
            tempData.push(temp)
            cbTran()
          })

        }, (err) => {
          res.status(200).json({status: "Success", data: tempData});
        })
      }
    })
  })

  router.post('/readAllByUserDateFilter' , (req , res) => {
    const {number,startDate, endDate} = req.body
    console.log(req.body)
    let thisMonth = moment().format('MMMM')
    let year = moment().format('YYYY')
    var stDate = ""
    var edDate = ""
    var tempData = []
    const s3 = new AWS.S3();
    if(!startDate && !endDate) {
      stDate = new Date('1 ' + thisMonth + ' '+year);
      edDate = new Date().setHours(23 , 59 , 59 , 999)
    } else {
      stDate = new Date(startDate).setHours(00 , 00 , 00 , 000);
      edDate = new Date(endDate).setHours(23 , 59 , 59 , 999);
    }
    Diary.find({number:number, createdAt: {$gte: stDate, $lte:edDate}}, (err, diaries) => {
      if(err) {
        console.error(err);
            return res.status(400).json({error : "Internal Error."});
      }
      if(diaries){
        async.forEach(diaries, (diary, cbTran) => {
          let temp = {
            status: diary.status,
            title: diary.title,
            description: diary.description,
            favspot: diary.favspot,
            favrestaurant: diary.favrestaurant,
            favmeal:diary.favmeal,
            startdate: diary.startDate,
            enddate: diary.endDate
          }
          if (diary.status == "Rejected") {
            diary.reason = diary.reason
          }
          diary.images = [];

          async.forEach(diary.imageKey , (key , next) => {
            const s3Param = {
              Bucket : bucketName,
              Key : key,
              Expires : 7200
            };
            // console.log(s3Param)

            s3.getSignedUrl("getObject" , s3Param , (err , url) => {
              if (err) {
                console.log("Error when get signed url in validations list : ");
                console.log(err);
                return res.status(400).json({error : "Internal Error"});
              }
              // console.log("push url to temp img")
              temp.images.push(url);
              // console.log(url)
              next();
            });
          }, (err) => {
            tempData.push(temp)
            cbTran()
          })

        }, (err) => {
          res.status(200).json({status: "Success", data: tempData});
        })
      }
    })
  })

  router.get('/readAllDiary' , (req , res) => {
    Diary.find({status:"Approved",createdAt:{$gte: stDate, $lte: edDate}}, (err, diaries) => {
      if(err) {
        console.error(err);
            return res.status(400).json({error : "Internal Error."});
      }
      if(diaries){
        async.forEach(diaries, (diary, cbTran) => {
          let temp = {
            status: diary.status,
            title: diary.title,
            description: diary.description,
            favspot: diary.favspot,
            favrestaurant: diary.favrestaurant,
            favmeal:diary.favmeal,
            startdate: diary.startDate,
            enddate: diary.endDate
          }
          diary.images = [];

          async.forEach(diary.imageKey , (key , next) => {
            const s3Param = {
              Bucket : bucketName,
              Key : key,
              Expires : 7200
            };
            // console.log(s3Param)

            s3.getSignedUrl("getObject" , s3Param , (err , url) => {
              if (err) {
                console.log("Error when get signed url in validations list : ");
                console.log(err);
                return res.status(400).json({error : "Internal Error"});
              }
              // console.log("push url to temp img")
              temp.images.push(url);
              // console.log(url)
              next();
            });
          }, (err) => {
            tempData.push(temp)
            cbTran()
          })

        }, (err) => {
          res.status(200).json({status: "Success", data: tempData});
        })
      }
    })
  })
The first /readAllByUser is a query to find all the diaries related to the specific user. We are finding the diaries by querying all the diaries based on the user's number. The /readAllByUserStatusFilter does pretty much the same but now we will also be able to filter all the diaries related to the user by it's status. And /readAllByUserDateFilter, well you know by now, it allows you to filter it by date the diary was created and relates to the user. Finally, /readAllDiary allows you to read all the diaries with the approved status and date it was created. But as you see, we filter the date by createdAt variable and you can't actually see the variable in your diary model. That's because createdAt is a variable created by the timestamps so it is created by default on the date the diary is created. So , now by using the createdAt variable we will be able to set for the user to view the most recently created diaries in the main page of the application.
Alright next, let's write the code to update the diaries.
router.post('/editDiary', (req , res) => {
    const {diaryId,number,title,desc, favspot, favmeal, favrestaurant, uri, startDate, endDate} = req.body
    let query = {_id: diaryId}
  var tempData = {};
  const regex = /^data:image\/\w+;base64,/;
  let diaryImgKey = [];
  console.log(req.body);
    console.log(query)
    Diary.findOne(query, (err, diary) => {
        if(err) {
            console.error(err)
            return res.status(400).json({error : "Internal Error"});
        }
    if(diary) {
      async.forEach(
        uri,
        (photoObj, callback) => {
          console.log(photoObj.uri);
          const body = Buffer.from(photoObj.uri.replace(regex, ""), "base64");
          const tempId = makeid(6);
          const key = `${number}/${tempId}/posmImage${tempId}`;
          diaryImgKey.push(key);
          const s3 = new AWS.S3();
          const param = {
            Bucket: bucketName,
            Key: key,
            Body: body,
            ContentEncoding: "base64",
            ContentType: photoObj.fileType,
          };

          s3.putObject(param, (err, data) => {
            if (err) {
              console.log("Error when uploading images to s3 in update posm : ");
              console.log(err);
              return res.status(400).json({ error: "Internal Error" });
            }

            console.log({ data });
            console.log("Uploaded to S3");
          });

          callback();
        },
        (err) => {
          if (err) {
            console.log("Error after loop photoset in update posm : ");
            console.log(err);
            return res.status(400).json({ error: "Internal Error" });
          }
          let Diaryinfo = {
            customer: {
              name: usr.name,
              number: usr.number
            },
            status: "Approved",
            title: title,
            description: desc,
            imageKey: diaryImgKey,
            favspot: favspot,
            favrestaurant: favrestaurant,
            favmeal:favmeal,
            startdate: startDate,
            enddate: endDate
          };
          Diaryinfo.save()
          .then(savedDiary => {
            console.log('done edit diary')
            console.log(savedDiary)
          })
          res.status(200).json({status: "Success"});
        }
      )
    }
    })
})
Well, it isn't too much different to uploading posts but we are finding the specific post that we are updating using the diary ID that is actually being auto generated when we creating the diary in the database. So, finally let's deal with deleting a specific diary. Let's paste this code in the diaryApi.js and we are done with handling the diaries.
router.post('/deleteDiary', (req , res) => {
    const {diaryId} = req.body
    let query = {_id: diaryId}
    console.log(query)
    Diary.deleteOne(query, (err, diary) => {
            if(err) {
                    console.error(err)
                    return res.status(400).json({error : "Internal Error"});
            }
            console.log('deleted')
            res.status(200).json({status: "Success"});
    })
})
This is almost similar to updating diaries, we pass the specific ID of the diary we want to delete and we find the diary and delete it from the database. That's it for handling the CRUD process for the diaries. I know this was lots of headache to take in at a single time. I literally took two weeks to finish up this post so I can assure you this is actually a lot of work. So , I guess for next week, we will move on to building the UI of the application. That will give us a move to a new side of development that will be involving JSX and CSS.