


Building a real time video text recognition app using Tesseract JS and React
There is an unknown trick in TesseractJS that allows you to read text from real time video. Are you ready to discover the secret?


Tesseract JS is well known as a npm module that can be used for reading text from images but one of the least talked ability of Tesseract JS is the real time video text recognition feature. With this feature, you can directly read the text from a video feed that is running such as a live recording. Today, we will be taking a look at how we can build this feature in React.
So, let's get started.
Content
- Setting up Tesseract JS
- Set up video and indicator size
- Create the video and indicator
- Adding the code to help tesseract read each frame
- The Full Code
- The Final Result
Setting up Tesseract JS
We will start with installing tesseract js using the below code.
npm i tesseract.js@2.1.1
We can then import the code below inside our react project into the App.js file to get started.
import React, { useEffect, useRef } from 'react';
import { createWorker } from 'tesseract.js';

const worker = createWorker();
Set up video and indicator size
Next, we going to set the size of the video screen and the indicator which would be a huge red box in the center of the video screen to specify where the user can place the text. Just add this code under the previous code in App.js.
// video config
const vidWidth = window.innerWidth - 60; // can be controlled
const vidHeight = 260; // can be controlled
const vidOffsetTop = 240; // can be controlled
const vidOffsetLeft = ((window.innerWidth) / 2) - (vidWidth / 2); // is centered, but if you want to change also can

// indicator config
const marginX = 40; // margin left and right, can be controlled
const indWidth = vidWidth - marginX; // 100% width - margin, can be changed if you want
const indHeight = 80; // can be controlled
const indOffsetTop = vidOffsetTop + (vidHeight / 2) - (indHeight / 2); // is centered, if you want to change also can
const indOffsetLeft = (window.innerWidth / 2) - (indWidth / 2); // is centered, if you want to change also can
Create the video and indicator
So, now we can add up the code that return us the video player that obtains the camera input and the indicator in the center of the video to specify where the user can place the text for better accuracy.
const App = ({ setCode, setScanning }) => {
    const myVideo = useRef();
    const myStream = useRef();

    return (
        <div>
            <video
                ref={myVideo}
                autoPlay
                muted
                playsInline
                width={vidWidth}
                height={vidHeight}
                style={{
                    position: "absolute",
                    top: vidOffsetTop,
                    left: vidOffsetLeft,
                    zIndex: 2
                }}
            ></video>
            <div
                style={{
                    width: indWidth,
                    height: indHeight,
                    border: "1px red solid",
                    zIndex: 3,
                    position: "absolute",
                    top: indOffsetTop,
                    left: indOffsetLeft
                }}
            ></div>

        </div>
    )
};

export default TesseractCam;
Run the video and load it into tesseract image processor
So, one thing about tesseract js is that it can only read text from images which mean it wouldn't be able to read the text on the video so, the trick to make that work is by obtaining the images as frames from the video because multiple frames of images creates a video. In this case, we will do the opposite and extract multiple frames from the video and let tesseract read the text in every frame of the video. We will do this using the useEffect function. Add the code above the return code and right after the const myStream = useRef();.
const scannedCodes = useRef();

useEffect(() => {
        if (myVideo && myVideo.current) {
            navigator.mediaDevices.getUserMedia({
                video: { facingMode: "environment" },
                audio: false
            })
            .then(stream => {
                myVideo.current.srcObject = stream;
                myVideo.current.play();

                myStream.current = stream;
                scannedCodes.current = {};

                (async () => {
                    await worker.load();
                    await worker.loadLanguage("eng");
                    await worker.initialize("eng");
                    requestAnimationFrame(tick);
                })()
            })
            .catch(err => {
                console.error(err);
                // handle error here with popup
            })
        }

        return () => myStream && myStream.current && myStream.current.getTracks().forEach(x => x.stop());
        // eslint-disable-next-line react-hooks/exhaustive-deps
    }, []);
Adding the code to help tesseract read each frame
So, as I mentioned earlier with the code in useEffect, it can help to provide frames to Tesseract to read and provide us the text from the real-time video. We achieve this using this specific function that you can see in the code which is requestAnimationFrame(tick); . But if you realise , we haven't really sorted out tick yet. So, that's exactly what we gonna do now. We will create a function tick where we will provide tesseract with the data it requires to perform the ocr function and later console log the data. So, go ahead and add this code below the useEffect code.
const tick = async () => {
        if (myVideo && myVideo.current && myVideo.current.readyState === myVideo.current.HAVE_ENOUGH_DATA) {
            // canvas
            const canvas = document.createElement("canvas");
            canvas.width = indWidth;
            canvas.height = indHeight;

            const image = myVideo.current;
            // source
            const sx = (marginX / 2) / 2;
            const sy = vidHeight - indHeight;
            const sWidth = indWidth * 2;
            const sHeight = indHeight * 2;
            // destination
            const dx = 0;
            const dy = 0;
            const dWidth = indWidth;
            const dHeight = indHeight;

            canvas.getContext("2d")
            .drawImage(image, sx, sy, sWidth, sHeight, dx, dy, dWidth, dHeight);

            // tesseract
            const { data: { text } } = await worker.recognize(canvas);
            const regex = /[a-zA-Z0-9]/gi;
            const scannedText = text && text.match(regex) && text.match(regex).filter(x => x).join("");
 console.log({text, scannedText});
            requestAnimationFrame(tick);
        }
    };
The Full Code
So in the end, your entire code should look something like this.
import React, { useEffect, useRef } from 'react';
import { createWorker } from 'tesseract.js';

const worker = createWorker();

// video config
const vidWidth = window.innerWidth - 60; // can be controlled
const vidHeight = 260; // can be controlled
const vidOffsetTop = 240; // can be controlled
const vidOffsetLeft = ((window.innerWidth) / 2) - (vidWidth / 2); // is centered, but if you want to change also can

// indicator config
const marginX = 40; // margin left and right, can be controlled
const indWidth = vidWidth - marginX; // 100% width - margin, can be changed if you want
const indHeight = 80; // can be controlled
const indOffsetTop = vidOffsetTop + (vidHeight / 2) - (indHeight / 2); // is centered, if you want to change also can
const indOffsetLeft = (window.innerWidth / 2) - (indWidth / 2); // is centered, if you want to change also can

const App = ({ setCode, setScanning }) => {
    const myVideo = useRef();
    const myStream = useRef();
    const scannedCodes = useRef();

    useEffect(() => {
        if (myVideo && myVideo.current) {
            navigator.mediaDevices.getUserMedia({
                video: { facingMode: "environment" },
                audio: false
            })
            .then(stream => {
                myVideo.current.srcObject = stream;
                myVideo.current.play();

                myStream.current = stream;
                scannedCodes.current = {};

                (async () => {
                    await worker.load();
                    await worker.loadLanguage("eng");
                    await worker.initialize("eng");
                    requestAnimationFrame(tick);
                })()
            })
            .catch(err => {
                console.error(err);
                // handle error here with popup
            })
        }

        return () => myStream && myStream.current && myStream.current.getTracks().forEach(x => x.stop());
        // eslint-disable-next-line react-hooks/exhaustive-deps
    }, []);

    const tick = async () => {
        if (myVideo && myVideo.current && myVideo.current.readyState === myVideo.current.HAVE_ENOUGH_DATA) {
            // canvas
            const canvas = document.createElement("canvas");
            canvas.width = indWidth;
            canvas.height = indHeight;

            const image = myVideo.current;
            // source
            const sx = (marginX / 2) / 2;
            const sy = vidHeight - indHeight;
            const sWidth = indWidth * 2;
            const sHeight = indHeight * 2;
            // destination
            const dx = 0;
            const dy = 0;
            const dWidth = indWidth;
            const dHeight = indHeight;

            canvas.getContext("2d")
            .drawImage(image, sx, sy, sWidth, sHeight, dx, dy, dWidth, dHeight);

            // tesseract
            const { data: { text } } = await worker.recognize(canvas);
            const regex = /[a-zA-Z0-9]/gi;
            const scannedText = text && text.match(regex) && text.match(regex).filter(x => x).join("");
            console.log({text, scannedText});
            requestAnimationFrame(tick);
        }
    };

    return (
        <div>
            <video
                ref={myVideo}
                autoPlay
                muted
                playsInline
                width={vidWidth}
                height={vidHeight}
                style={{
                    position: "absolute",
                    top: vidOffsetTop,
                    left: vidOffsetLeft,
                    zIndex: 2
                }}
            ></video>
            <div
                style={{
                    width: indWidth,
                    height: indHeight,
                    border: "1px red solid",
                    zIndex: 3,
                    position: "absolute",
                    top: indOffsetTop,
                    left: indOffsetLeft
                }}
            ></div>
        </div>
    )
};

export default App;
Final Result
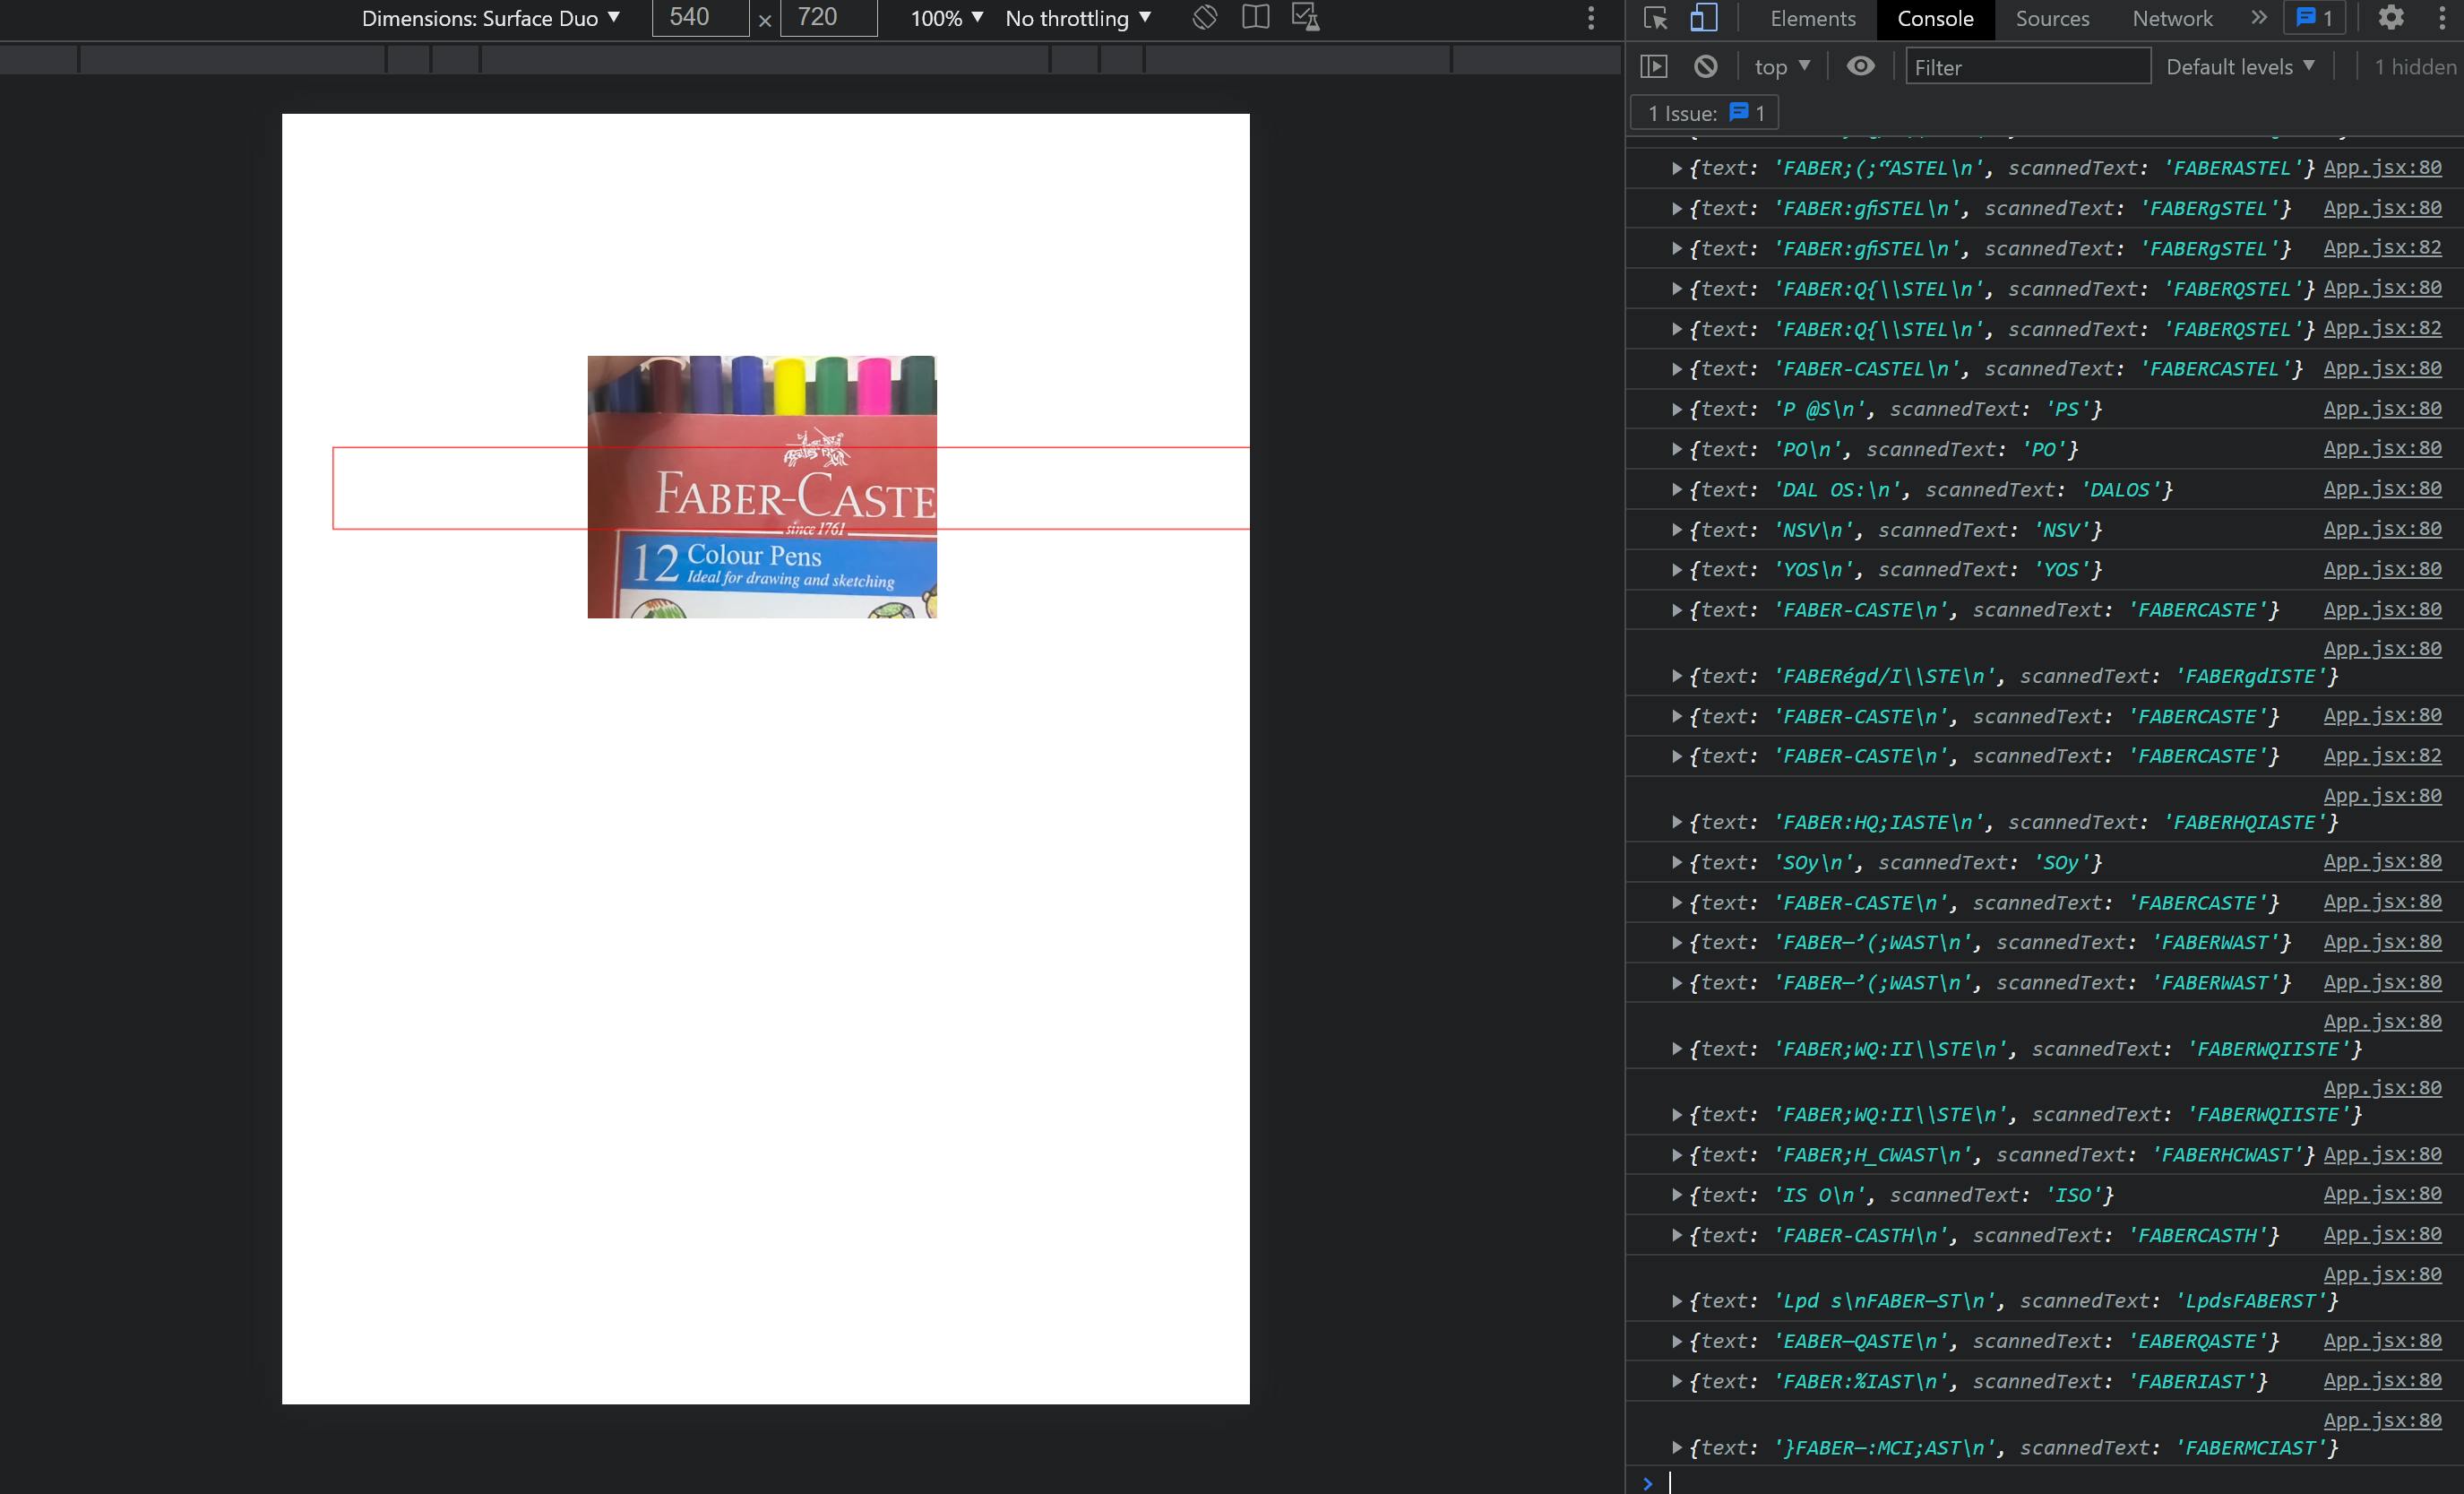
As you can see in the image below, now the app could be able to read the faber castle text , eventhough it's not the most accurate reading but you could obtain something close to the text shown inside the red indicator.
Well, that's it for this tutorial. Hope you enjoyed it.